Search Our Site
")


Gumerflat.
300m far from Puerta del Sol
Gumerflat is located in the city centre of Madrid, this air-conditioned apartment is just 300m far from Puerta del Sol and really close to Fnac. Free wifi is available in the apartment.
La Latina.
Stay in the Heart of Madrid
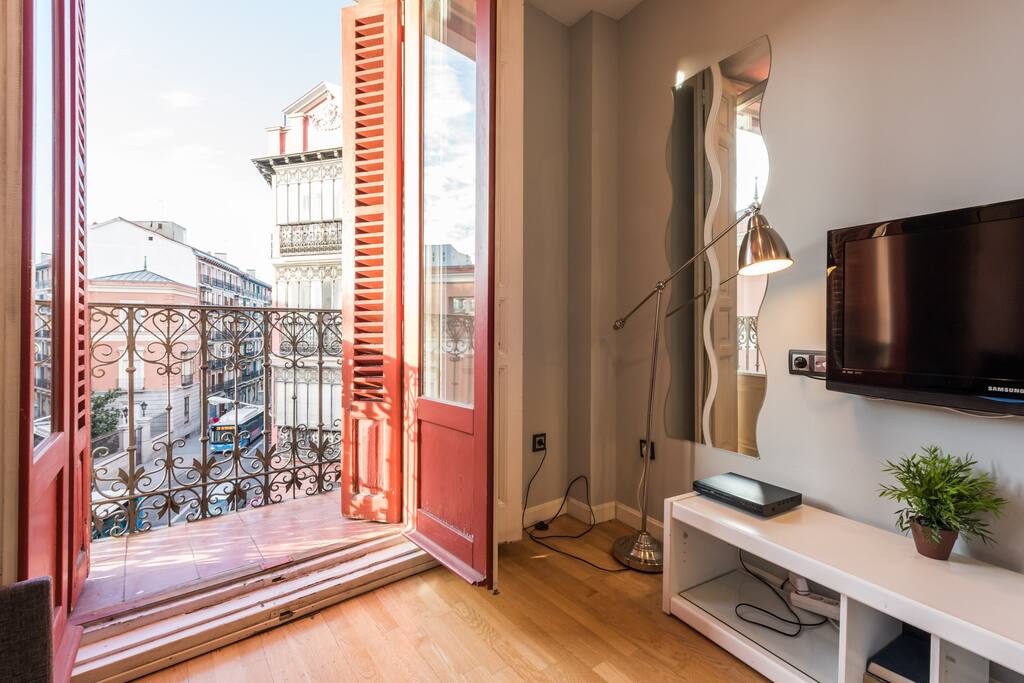
Newly renovated, at the beginning of the sweep of La Latina, and 100 meters from the Plaza Mayor. Exterior apartment offering lots of light and beautiful views from your balcony.
Very close to the Plaza Mayor
The city centre of Madrid is a really great choice for travelers interested in enjoying the nightlife of this amazing city, eat tapas and go sightseeing.
GUMERFLAT - CENTRICAL APARTMENT
Madrid, Comunidad de Madrid, España
Apartamento decorado con un estilo elegante y acogedor, muy tranquilo y luminoso, situado en la zona privilegiada del centro de Madrid, entre Sol y Gran Vía, una ubicación perfecta y el sitio ideal...
CENTRICAL APARTMENT IN "LA LATINA"-"PLAZA MAYOR"
Madrid, Comunidad de Madrid, España
Apartamento recién reformado, al inicio del barrido de La Latina, y a 100 metros de la Plaza Mayor. Apartamento exterior que oferece mucha luz y preciosas vistas desde su balcón. Te permite ir an...

Gumerfalt.
All at your fingertips
The distances are shortened from GumerFlat Converse, for example, the Royal Theatre is 400m, only 6 minutes on foot.Check Availability

Gran Vía
¡Only 2 minutes away!- 142m on foot -

Puerta del Sol
¡Only 4 minutes away!- 286m on foot -

Connect with all Madrid
We have several metro stations near to go anywhere in Madrid.Check Availability

Callao
¡Only 2 minutes away!- 140m on foot -

Sol
¡Only 3 minutes away!- 240m on foot -

La Latina.
There are no distances.
Just 100 meters from the Plaza Mayor you will be surrounded by the most bohemian restaurants in the city. Check Availability

Calderon Theatre
¡Only 4 minutes away!- 280m on foot -

Puerta del Sol
¡Only 7 minutes away!- 500m on foot -
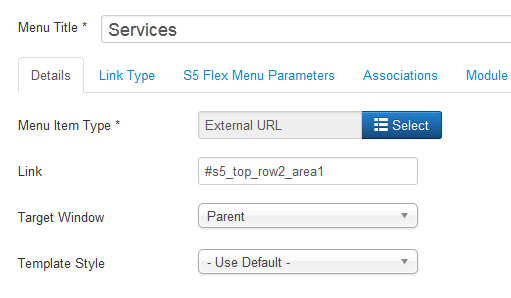
This template includes a scroll to feature that will scroll your page to a specified section of your site. All you have to do is create an external link in your menu manager and then in the URL area enter in any ID on your page. You can reference any of the following IDs in order:
Screenshot of admin area of an external menu item with DIV reference entered:
- #s5_header_area1
- #s5_top_row1_area1
- #s5_top_row2_area1
- #s5_top_row3_area1
- #s5_center_area1
- #s5_bottom_row1_area1
- #s5_bottom_row2_area1
- #s5_bottom_row3_area1
- #s5_footer_area1
Screenshot of admin area of an external menu item with DIV reference entered:
The S5 Box can be demo'd by clicking on either the Login or Register buttons found towards the top of this page.
The module allows for up to 10 different S5 Box's on one page all via 10 module positions. You simply add a class to any HTML element on your site and enable the corresponding box and you are good to go!
To enable the login and register modules:
- 01Install the S5 Box module and publish it to all pages on your site. Try to publish it to a position where a module already exists on all pages, but don't worry it won't change the layout of your site, the script is automatically hidden on your site.
- 02Install and publish the S5 Register module to the 'register' module position
- 03Publish the default Joomla login module to the 'login' module position.
- 04In your template parameters area of Joomla you can change the text for login, register and logout.
- 05That's it, you're all done!
If you do not wish to use the S5 Box but would still like to use the Login and Register links then simply complete step 4 above and also fill out your own custom urls just below those fields in the template configuration. Filling out the custom url fields will disable the S5 Box.
The S5 Box runs off of the core Joomla jquery/mootools libraries so there will be no conflicts with third party extensions or extra javascript files to download.
Features:
- Powered by no conflict mode jQuery Javascript or mootools
- Choose, elastic, fade or none for the popup effect
- Up to 10 S5 Box's throughout your site or on any one page!
- Set the percentage of width of each box according to overall screen size
Tutorial on how to get the s5 box working and use all 10 module positions it includes:
- 01Adding the S5 Box positions:
- Open up the templateDetails.xml file included with the template you are using.
- Locate the positions area.
- Start adding new positions s5_box1, s5_box2, s5_box3, etc all the way up to s5_box10.
- 02Adding the S5 Box classes:
- The S5 Box class name of the corresponding position must be added to the link that will open the box. For example the following code will display a link that says Click Here and will open the S5 Box and display whatever module is published to the s5_box3 module position:
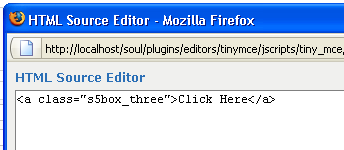
- These classes can be added to any element, ie: divs, spans, etc., but the common use will be to add this into content with a link similar to the one shown in the picture above. To enter this link you must do so from the HTML edit screen on your content editor:
Once you have clicked the HTML button the HTML code window will appear much like the first image. - You can continue adding these classes throughout your site just be sure to have published a module to the corresponding position or the box will not work correctly. So if you add the class s5box_two you will also have to publish a module to the s5_box2 position.
- Module positions and their corresponding classes:
s5_box1 = s5box_one
s5_box2 = s5box_two
s5_box3 = s5box_three
s5_box4 = s5box_four
s5_box5 = s5box_five
s5_box6 = s5box_six
s5_box7 = s5box_seven
s5_box8 = s5box_eight
s5_box9 = s5box_nine
s5_box10 = s5box_ten
- 03Lastly, publish your modules to the S5 Box positions:
- Now that you have added the s5 box positions just go to your site modules area and publish modules to those positions
- Make sure that you have added a class to an HTML element as described above or the s5 box will have no activation button
- Also make sure to publish the actual s5 box to a non s5 box position, perhaps publish it to the "debug" position or a similar one in your template.
Main S5 Box Module Settings:
- In the backend of the S5 Box module you can adjust the width of each box independent of each other.
- Make sure that the S5 Box module is published to all pages, it can be published to any template position. Also make sure that the module opening in the box is published to the page the link is on.
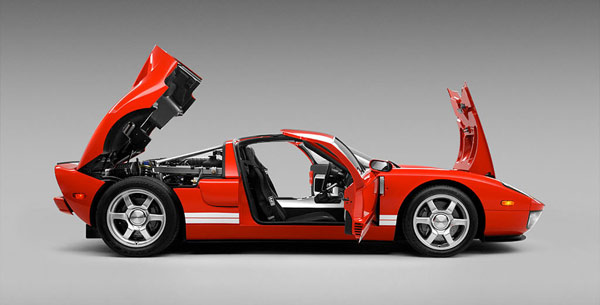
The lazy load script is a great way to save bandwidth and load your pages much faster. Images that are not visible on the initial page load are not loaded or downloaded until they come into the main viewing area. Once an image comes into view it is then downloaded and faded into visibility. Scroll down this page to see the script in action.
Setup is very easy! By default this script is disabled, in order to enable it simply choose All Images or Individual Images from the drop down, as shown below from inside the template configuration page.

All images will load every standard image on the page with lazy load. There is no extra configuration or extra code to add with this configuration, it will just happen automatically. Individual images would be used if you want only certain images to load with this script and not all of them. To do this simply add class="s5_lazyload" to the image like so:
This script is compatible with Firefox3+, IE8+, Chrome14+, Safari5.05+, Opera 11.11+


Setup is very easy! By default this script is disabled, in order to enable it simply choose All Images or Individual Images from the drop down, as shown below from inside the template configuration page.
All images will load every standard image on the page with lazy load. There is no extra configuration or extra code to add with this configuration, it will just happen automatically. Individual images would be used if you want only certain images to load with this script and not all of them. To do this simply add class="s5_lazyload" to the image like so:
<img class="s5_lazyload" src="http://www.yoursite.com/image.jpg"></img>
This script is compatible with Firefox3+, IE8+, Chrome14+, Safari5.05+, Opera 11.11+
See the script in action:
- 01Download the installation package from our download section.
- 02Once the download is complete go to the backend of Joomla.
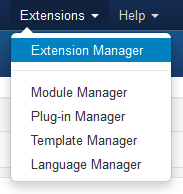
- 03Navigate through your menu system to Extensions/Extensions Manager.
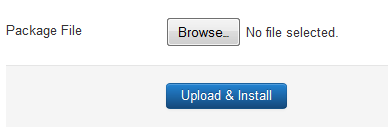
- 04Once at the installation screen click the browse button and navigate to where you downloaded the template file.
- 05Once you have the file selected click 'Upload File and Install'
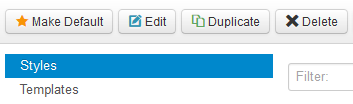
- 06Navigate through your menu system to Extensions/Template Manager.
- 07Find the radio button next to the newly installed template.
- 08Click on the Default button at the top right of the screen and you're done!
The template is now installed, now let's set it as the default template:
The info slide script is a great way to display your content to your customers! It will place a sliding text box over any image on the page. It can be placed inside of content or modules. It will also automatically adjust to any size screen size on window resize. See below for a demonstration. In the backend of Vertex you can pick between a javascript only version or a pure css version.
Javascript Version
CSS Version Default
CSS Version 1
CSS Version 2
CSS Version 3
Example Slide
This is dummy text. You can add any
text or html markup here.
CSS Version 4
Example Slide
This is dummy text. You can add any
text or html markup here.
CSS Version 5
Example Title
Example Title
CSS Version 6
Example Title
Example Title
CSS Version 7
CSS Version 8
CSS Version 9
I like what I see! I want to JOIN TODAY.
Contact Us
Contact Us
Booking
Thanks for staying with us! Please fill out the form below and our staff will be in contact with your shortly.